Sunday, December 02, 2007

Roasted Spiced Sweet Potatoes


Some day--no time soon, mind you, but some day--I'm going to be a horrible pregnant woman. Already, despite being 100 percent non-gestating, I have incredibly specific food cravings, often for frustratingly unspecified dishes.

Today, for instance, I was grooving on the memory of some great Thanksgiving sweet potatoes (Craig Claiborne's recipe, for those who are interested), but wasn't in the mood for the traditional brown sugar glaze. Instead, I wanted something spicy and exciting to go with the lamb chops and baby bok choy I had planned for dinner. And now, thanks to the miracle of Google, even very vague cravings can be satisfied. A search for "sweet potatoes + spices + recipe" yielded this fantastic, hit-the-spot result. These are definitely going into the regular rotation, since they're as easy as they are tasty and they make the house smell fabulous. I'm sure to be craving them again soon.

Hey, at least it's not pickles and ice cream.

***
Roasted Spiced Sweet Potatoes

Preheat oven to 425 degrees

Combine:
1 Tablespoon ground coriander
1 1/2 teaspoon oregano
1 teaspoon allspice
1 teaspoon cayenne pepper (this makes them fairly spicy, adjust according to your preferences)
1 teaspoon salt
3 Tablespoons oil

Wash and cut into steak fry-sized wedges, leaving the skin on:
3 large sweet potatoes

Coat potatoes in oil and spices, spread on baking sheet, and bake for 40 minutes, turning once.

Wednesday, November 21, 2007

Into the Meat Grinder: Bittman's Best Burgers

Since I'm on quite a New York Times recipe kick, I might as well post my long-ignored and semi-ignoble effort from this summer at grinding my own meat for burgers. I'm generally not a fanatical DIY cook. I don't can things. I don't bake bread. I only make stock grudgingly and as a sous chef. But ol' Bittman convinced me that burger nirvana was right around the corner if only I ground my own.

And he didn't just convince me, he convinced Toast-Mother-in-Law, a New Yorker and avid reader of the Times. So this summer she brought some chunks of sirloin out to Long Island and we went to work.

After singing the praises of hand-ground meat--and reassuring us that all we needed was a food processor, not some hand-cranked machine manned by a beefy guy in a bloody apron--Bittman warns readers: "Don’t overprocess. You want the equivalent of chopped meat, not a meat purée. The finer you grind the meat, the more likely you are to pack it together too tightly, which will make the burger tough."

These seemingly low-key words struck a little too much fear in my heart and I underprocessed. Bittman has also exhorted us to buy fatty meat, and my burgers had too many pieces of insufficiently ground fat in them to really be enjoyable. Still, they were very flavorful and I might try again next summer.

If you're looking to recall summer on the first day of flurries (in Boston, anyway) try these under the broiler on on the stove top. And don't be afraid to grind aggressively.

***
Bittman's Burgers
As printed in The New York Times

1 1/2 to 2 pounds not-too-lean sirloin, in chunks
1/2 white onion, peeled and in chunks, optional
Salt and pepper to taste.

1. Start a charcoal or wood fire or preheat a gas grill. Or, on stove top, heat a large, heavy skillet over medium-high heat for 3 or 4 minutes.

2. Put meat and onion in a food processor, in batches if necessary, and pulse until coarsely ground: finer than chopped, but not much. Put it in a bowl and sprinkle with salt and pepper. Taste, then add more seasoning if necessary. (If desired, cook a teaspoon of meat in a pan before tasting.) Handling meat as little as possible to avoid compressing it, shape it lightly into 4 or more burgers.

3. Fire is hot enough when you can barely stand to hold your hand 3 or 4 inches over rack for a few seconds. Grill burgers about 3 minutes a side for very rare, and another minute a side for each increasing stage of doneness, but no more than 10 minutes total unless you like hockey pucks. (Timing on stove top is the same.)

4. Serve on buns, toast or hard rolls, garnished as you like.

Tuesday, November 20, 2007

Mango Chicken with Caramelized Onions


I'm not sure when it happened, but I am pretty much exclusively a sweet onion gal. Sure, I'll buy the occasional red onion for a particular recipe, or a big mesh bag of plain yellow onions if I must. But if there are Vidalias available, I'll grab them every time.

I suspect that this has something to do with my serious impatience as a cook. Waiting for onions to soften, or God forbid, caramelize is torture for me. So I cheat with high-sugar, already softish sweet onions.

For a while I was on a campaign to convince the Human Vacuum that sweet onions don't make you tear up as much, in an effort to keep him from fleeing the kitchen when the onion slicing began. I've stalwartly stuck to this position, but he and I both know it's pretty much a lie.

Below, a recipe for when you're up to some serious onion frying.

***
Mango Chicken with Caramelized Onions

In a large skillet over medium heat, warm:
1 Tablespoon olive oil
1 Tablespoon butter

Add:
2 large sweet onions, very thinly sliced

Saute until onions are very soft and quite brown--this is where the flavor comes from, so don't skimp. Turn the heat up to high and add:
Glug of vermouth or white wine

Wait for most of the liquid to cook off, then add:
1 pound chicken thighs, trimmed and cut into 1 inch chunks

Brown chicken, then add:
2 ripe mangoes, peeled , cored, and cut into 1 inch chunks
1/4 teaspoon cayenne pepper
1 Tablespoon dried cilantro, or 2 Tablespoons fresh cilantro, roughly chopped

Cook until mangoes soften slightly and serve over rice.

Monday, November 19, 2007

Sinful/Ethical Macaroni and Cheese


There has been a lot going on Chez ToastPoint in recent months, not least of which is that its denizens decided to stop living in sin. So I am now Mrs. Human Vacuum. But just when the sinfulness quotient had fallen to near zero in our household, I decided to make mac and cheese. What’s that you say? Mac and cheese--the dinner of choice for millions of angelic children everywhere--seems innocent enough? Ha. Not if the ratio of cheese to pasta is 2:1. You read that right: the dish pictured above contains one half of a pound of pasta and a full pound of cheese.

This recipe was on the “most emailed” list at The New York Times homepage for weeks, and deservedly so. Before now, I’d never made mac and cheese at home from scratch, but restaurant mac and cheese nearly always disappoints. Too much white sauce, not enough cheese, and never enough crisped, chewy top layer. This recipe answers all those objections. It is the Platonic form of mac and cheese. (And easy to make too!)

So what occasioned this dive into gluttony now? Lately, H.V. has been playing tennis with a friend of his on the occasional weekend evening. The boys return from their game and I feed them--a pleasingly domestic event. This particular friend is a very ethical eater. He is the sort of person who carries around a card in his wallet with lists of which fish are OK and which are off limits from an ecological standpoint. He’s evangelical about his decisions in an ultra-low key way. He’s also a gratifying big eater, which makes a cook forgive the slight inconvenience of a big list of verboten ingredients. And this meal goes to show that you can be ethical and sinful all at once.

***
Creamy Macaroni and Cheese
The recipe, as provided in The New York Times, which I followed very nearly exactly, with excellent results.

2 Tablespoons butter
1 cup cottage cheese (not lowfat) (NOTE: I used 2 percent)
2 cups milk (not skim) (NOTE: I used whole milk)
1 teaspoon dry mustard
Pinch cayenne
Pinch freshly grated nutmeg
1⁄2 teaspoon salt
1⁄4 teaspoon freshly ground black pepper
1 pound sharp or extra-sharp cheddar cheese, grated
1⁄2 pound elbow pasta, uncooked.

1. Heat oven to 375 degrees and position an oven rack in upper third of oven. Use 1 tablespoon butter to butter a 9-inch round or square baking pan. (NOTE: I used a 7 inch round deep casserole and it was fine)

2. In a blender, purée cottage cheese, milk, mustard, cayenne, nutmeg and salt and pepper together. Reserve 1⁄4 cup grated cheese for topping. In a large bowl, combine remaining grated cheese, milk mixture and uncooked pasta. Pour into prepared pan, cover tightly with foil and bake 30 minutes. (NOTE: Whirl everything but the milk first, to break up the cottage cheese curds)

3. Uncover pan, stir gently, sprinkle with reserved cheese and dot with remaining tablespoon butter. Bake, uncovered, 30 minutes more, until browned. Let cool at least 15 minutes before serving.

***
We started with my favorite pea soup and finished with homemade pumpkin bread, but The New York Times suggests pairing this perfect mac and cheese with a green salad and a glass of wine, which sounds about right to me, too.

Thursday, September 06, 2007

Tomato Paella


Tomato paella. It sits on the line between fussy and stupidly simple. Yes, stock has to be heated in a separate pan—but you could probably skip the heating, or the stock for that matter (water works). Yes, the tomatoes have to be soaked in olive oil and salt and pepper, but you could probably skip that, too. Don’t have the right rice? Use plain old medium-grain Goya (as I did), it’ll be fine. So make this by the book, or go slapdash. The New York Times’ Mark Bittman never fails.

One thing though: the tomatoes really do have to be good. I was packing juicy, meaty ones, fresh from the Long Island farm stand, and they were awesome.

Here’s the recipe as the Times ran it. Or you can watch the video. Very easy to follow. I didn’t have tomato paste, so I substituted finely chopped sun dried tomato and it was delicious.

***
Paella With Tomatoes

3 1/2 cups stock or water

1 1/2 pounds ripe tomatoes, cored and cut into thick wedges

Salt and freshly ground black pepper

1/4 cup extra virgin olive oil

1 medium onion, minced
1 tablespoon minced garlic

1 tablespoon tomato paste (or chopped sun dried tomato --ed)

Large pinch saffron threads (optional)

2 teaspoons Spanish pimentón (smoked paprika), or other paprika

2 cups Spanish or other short-grain rice

Minced parsley for garnish.

1. Preheat oven to 450 degrees. Warm stock or water in a saucepan. Put tomatoes in a medium bowl, sprinkle with salt and pepper, and drizzle them with 1 tablespoon olive oil. Toss to coat.

2. Put remaining oil in a 10- or 12-inch ovenproof skillet over medium-high heat. Add onion and garlic, sprinkle with salt and pepper, and cook, stirring occasionally, until vegetables soften, 3 to 5 minutes. Stir in tomato paste, saffron if you are using it, and paprika and cook for a minute more. Add rice and cook, stirring occasionally, until it is shiny, another minute or two. Add liquid and stir until just combined.

3. Put tomato wedges on top of rice and drizzle with juices that accumulated in bottom of bowl. Put pan in oven and roast, undisturbed, for 15 minutes. Check to see if rice is dry and just tender. If not, return pan to oven for another 5 minutes. If rice looks too dry but still is not quite done, add a small amount of stock or water (or wine). When rice is ready, turn off oven and let pan sit for 5 to 15 minutes.

4. Remove pan from oven and sprinkle with parsley. If you like, put pan over high heat for a few minutes to develop a bit of a bottom crust before serving.

The whole thing takes about 30 minutes, and yields 4 to 6 servings.

Tuesday, July 17, 2007

Sweet-Corn Fritters

There's something marvelous about fritters. They tap into my longing to be a strong American pioneer wife (as does anything with molasses), and the word fritter is fantastic. Etymologically, what more could you ask than for a word that means "tiny, tasty morsels" to also mean "to squander or disperse piecemeal; waste little by little"?*

This recipe verges on corn pancakes--they're deliciously fluffy and light--though spicy enough to keep the sweetness of the corn under control. The trick with cooking these suckers is to wait until you see bubbles emerging through the raw batter on top of each fritter in the pan before you flip them, just like you would for thick breakfast pancakes.

*In looking for the dictionary.com link above, I discovered the the two meanings of fritter are not etymologically related: The fritters pictured above are [Middle English friture, from Old French, from Late Latin frīctūra, from Latin frīctus, past participle of frīgere, to roast, fry], while the frittering away of time on, say, this blog is [Probably from fritter, fragment, probably alteration of fitters, from fitter, to break into small pieces]. Huh.

***
Sweet-corn fritters
Original recipe here

Combine in a large bowl:
1 cup flour
1 Tablespoon baking powder
pinch paprika, salt, and pepper

Beat together, then add to the dry ingredients and mix well:
2 eggs
1/2 cup milk

Add:
2 cups (approx.) sweet-corn kernels, cut off 6 cobs (UPDATE: cooked or uncooked works, as long as the corn's not cooked to death. Frozen corn is also an option)
1/2 cup sliced scallions or shallots
Small handful parsely or cilantro or basil or baby spinach leaves, chopped
1-2 small hot peppers, Thai peppers or jalapeno, minced

Pour a generous amount of vegetable oil into a large skillet, then drop heaping spoonfuls of batter into the pan in small batches. Fry for approx. 2 minutes on a side.

Eat over a spinach salad, or dolloped with sour cream.

Wednesday, July 11, 2007

Ratatouille: A Movie and Dinner

Some of you may recall that I became extremely excited about the new Pixar movie, Ratatouille, when it was announced last fall. After seeing it, I had no choice but to do a version of the dish as whipped up by Remy, our rodentine hero. Especially since the Human Vacuum's mom (my mother-out-law, previously mentioned here and in my other ratatouille recipe here), had just come home with a bunch of individually-sized enameled baking dishes from a Long Island tag sale.

Mine isn't quite French Laundry (which served as the food consultant for the film), but it's a little fancier than your average ratatouille and there's something very satisfying about getting your own personal baked dish of anything, I think. It's like being at a restaurant, except there's no fussy plating. You just yank the baking dishes out of the oven and plonk them down in front of people.

As always, I have omitted the peppers here, since I don't like them and they would have ruined my disk-based composition.

***
Remy's Ratatouille
(Inspired by Pixar's Ratatouille. Seriously, I worked hard to duplicate the steps taken by a cartoon rat during a musical montage. Sheesh, I'm a nerd.)

Preheat oven to 425 degrees.

In a small skillet, heat:
2-3 Tablespoons olive oil

Fry until golden:
5 cloves garlic, finely minced or microplaned

Add and cook until the color starts to darken and the caramelize:
6 Tablespoons (or one small can) tomato paste

Oil the bottoms of 4 individual shallow enameled dishes (or one large one), then spread each one with the tomato paste mixture, dividing it equally. Arrange in the dishes, in an alternating pattern so that they look like the picture above:
3 zucchini, cut into 1/4 inch coins and lightly salted and oiled
3 yellow/summer squash, cut into 1/4 inch coins and lightly salted and oiled
3 roma tomatoes, cut into 1/4 inch slices and lightly salted and oiled
3 Chinese eggplants (the long, narrow, bright purple ones), cut into 1/4 inch coins and lightly salted and oiled
(NOTE: If you have time, cut the veggies in advance, salt them--but don't oil them--and spread them out to paper towels. The goal is to remove as much moisture as possible ahead of time to keep the product from getting soupy. I did this in a pretty perfunctory way and I was fine.)

Dust with cracked pepper and tuck in springs of fresh rosemary and thyme (or the dried herb of your choice). Cover with foil or parchment paper and cook for about 45 minutes, or until the veggies are meltingly soft and the tomatoes are wrinkled and collapsed like little old men.

Sprinkle with toasted bread crumbs and lots of parmesan and serve immediately, or let cool and reheat when ready to serve.

Because the Human Vacuum loves his ratatouille over pasta, I put a bowl of olive oil slicked, peppery bowties on the table as well, and extra parmesan to pass.


Update: Apologies to commenters. I had to disallow comments on this post because of spam.

Thursday, June 14, 2007

Shrimp on the Barbie


This can't even be called a recipe. Just a suggestion. But consider it a strongly-worded suggestion. More like marching orders, really.

Buy a big bag of giant frozen shell-on shrimp--the ones that come 8-10 shrimp to a pound. You can get these really huge ones in a grocery store freezer case sometimes, prebagged. They're cheaper there, and the "fresh" ones in the seafood display case were frozen anyway.

Thaw them, then skewer them in fat rows, curled against each other like they are spooning. I didn't have proper barbecue skewers, so I soaked come chopsticks in water and used them instead. Slap the skewers onto the banked fired of a barbecue grill, cooking them until the shells start to blacken and the flesh of the shrimp turns bright white and opaque. After careful study, I've determined that the process works best if you cook while consuming a beer or a glass of white wine in the picturesque summer twilight.

Grab a skewer each, and immediately consume the world's best barbecue first course, burning your hands on the shells. If you manage to get them peeled without a trip to the hospital for second degree burns, try dunking in premade peanut sauce, cocktail sauce, or black bean sauce.

Retro Angel Food Cake


Nobody ever bakes a cake for their neighbors anymore. Why is that? Cakes are just as easy--easier, if you count box cake (and I do)--to make today as in 1950. I'm sure there are many complex sociological reasons having to do with the increased presence of women in the workforce, commute time, the falling price of prepared foods, the fact that no one uses their kitchens anymore, and that we bowl alone. But all of that social science added up to my enormous delight when Mr. and Mrs. ToastFriend came over for dinner recently with a cake in tow. And not just any cake: a genuine, homemade coconut angel food cake on a polka-dotted cake stand. Did you get that? It was on an actual cake stand, people!

The recipe, as emailed from Mrs. ToastFriend below, seems seductively easy with the help of an electric mixer. But I recommend my method: Wait until someone shows up at your door with one.

***
Angel Food Cake: Many Possible Variations
From page 705 in the 75th anniversary edition of the Joy of Cooking

Preheat oven to 350 degrees.

Use an UNgreased 10-inch tube pan (this cake is BIG, a smaller pan won't cut it; I'd wash the pan right before use, there can be no grease or oily residue otherwise the cake will collapse b/c it is so light and airy it needs to "stick" to the sides of the pan for support. The first time I made this cake I didn't pay attention to this instruction and it was about half as tall as the cake I brought to your house. And lopsided. Tube pan is clutch for the same reason.)

Sift together:
1 cup cake flour (if you don't use cake flour, sift the all purpose flour a few extra times to try to simulate cake flour for the fluff factor)
3/4 cup sugar
1/2 teaspoon salt

Combine in large bowl and beat on low speed for 1 minute:
1 1/2 cups egg whites (about 11 or 12 large whites)
1 tbsp water
1 tbsp lemon juice
1 teaspoon cream of tartar
1 teaspoon vanilla
1/4 teaspoon almond extract (optional, be careful b/c it is very easy to overdose on the almond extract, a tiny bit goes a really long way) for coconut flavor: add 1/2 teaspoon coconut extract

Increase speed to medium-high and beat until the mixture increases to 5 times in volume and resembles a bowl of soft foam (3-5 minutes). On medium-high speed, beat in another 3/4 cup of sugar, 1 tbsp at a time, taking 2-3 minutes

When all the sugar has been added, the foam will be creamy white and hold soft, moist, glossy peaks that bend over at the points; do not beat until stiff.

Sift a fine layer of the flour mixture (about 1/4 cup) evenly over the batter and fold gently with a rubber spatula only until the flour is almost incorporated. Do not stir or mix. Repeat 7-8 more times until flour mixture is used.

If you're going for coconut cake, fold 1/2 cup of shredded coconut in with the last addition of flour (the sweetened dried kind works the best I think, of course!)

Pour batter into UNgreased pan. Bake at 350 for 35-40 minutes (I actually only baked it for about 28 minutes last time.)

Quick icing
Just beat 4 cups (1 lb, usually one box) of confectioners' sugar with 1/2 cup of butter (softened). Then add in 2 teaspoons of vanilla extract, a pinch of salt, and 5 tbsp of a liquid--not water but milk, sherry or schnapps, or even coffee works (coffee aesthetically makes the cake look a little dumpy unless you cover the outside with shredded coconut for a brown and white ensemble.)

Note: I bet you could do a really tasty orange or lemon version of this, too. I'd fold in the zest of one or two lemons or oranges instead of the coconut in that final stage. And substitute a tbsp of freshly squeezed oj for the lemon juice.

Tuesday, May 08, 2007

No Coulis for Me!

Fancy chefs have mostly gotten over this by now, but the managers of banquet halls and "casual dining" restaurants haven't gotten the memo: Enough with the coulis already!

I understand the principle here: A drizzle of raspberry covers a multitude of sins. Dry chocolate cake? Coulis! Colorless panna cotta? Coulis! Huge slab of bland cheesecake? Coulis!

For those of us who are not big fans of the raspberry to begin with, this is sheer torture. In fact, the coulis has become so standard that many menus neglect to mention its presence at all, thus denying a polite, if fanatically coulis-averse diner from requesting that it be omitted. And it is the height of churlishness to send back a dessert due to unannounced drizzle. (Not that I haven't been tempted.) But nothing is sadder than the pure joy of a slice of chocolate cake tainted by overly sweet, radioactive red raspberry drizzle.

So...enough! We unhappy few shan't be trod upon any longer. Stand up for your right to a coulis-free dessert! Join my Anti-Coulis Crusade, small and quixotic thought it may be. Adorn your blog with one of my logos (below) and boldly speak up in restaurants: "No Coulis for me."

***
Just think what the world could have been like if great men had devoted themselves to a topic that truly mattered, like coulis:

Martin Luther King, Jr.:
I have a dream that my four little desserts will one day live in a nation where they will not be judged by the color of their drizzle but by the content of their character.

Karl Marx:
A spectre is haunting American restaurants—the spectre of coulis.

The Anti-Coulis Crusaders disdain to conceal their views and aims. They openly declare that their ends can be attained only by the forcible overthrow of all existing patisserie conventions. Let the ruling classes tremble at an dessert revolution. The proletarians have nothing to lose but their coulis. They have a world to win.

Students for a Democratic Society at Port Huron:
We are people of this generation, bred in at least modest comfort, housed now in universities, looking uncomfortably at the desserts before us.

The American Founders:
We hold these truths to be self-evident, that all eaters are created equal, that they are endowed by their Creator with certain unalienable Rights, that among these are Life, Liberty and the freedom from raspberry drizzle. That to secure these rights, restaurants are instituted among Men, deriving their just powers from the consent of the eaters, — That whenever any dessert service becomes destructive of these ends, it is the Right of the Eaters to alter or to abolish it.

***
If you care to join my tiny, pointlessly furious anti-coulis campaign, feel free to steal my big logo, the shrunken version at bottom, or use this little guy:


Sunday, May 06, 2007

Braised Bok Choy

This recipe is worth a trip to Chinatown. Of course, I am a woman who will seize virtually any reason to go to Chinatown. A dim sum run is my excuse of choice, but I've been known to head out because the freezer seems kind of empty (frozen dumplings are a staple in our household), when I get a craving for a particular kind of tea with preserved lemons, because I need to get a housewarming gift for someone (a set of bowls from a cheap Chinatown supply shop is always a good choice), or just because I have nothing better to do on a Sunday.

Once there, of course, a bagful of cheap veggies is a must. On a recent trip, an old women was unloading a box of the tiniest bok choy I have ever seen. You've heard of baby bok choy? These were fetus bok choy, or potentially blastocyst bok choy. I was standing there with my plastic bag, trying to make a decision when she appeared with hands full. The decision was made. I opened my bag, and from her two hands fell 12 perfect specimens.

The recipe below couldn't be simpler. The original recipe, from Nigella's Forever Summer, calls for Boston butter or little gems lettuces. I made it once with lettuce, and wasn't bowled over. But when Nigella insists on something, it stays with you. And this version with bok choy is divine.

***
Braised Bok Choy
Inspired by Nigella's "Braised Little Gems"

Preheat oven to 400 degrees.

In a roasting pan or baking dish, lay in tidy rows:
12 tiny bok choy (this probably wouldn't work with anything much bigger than what I described above. For scale, the pan pictured is 9 by 16 inches.)

Pour over:
2-3 cups chicken stock

Drizzle on:
3 Tablespoons olive oil

Sprinkle on:
2 teaspoons dried thyme, or the leaves from a small handful of fresh thyme sprigs
Lots of salt and pepper

Cover tightly with foil and bake for 40 minutes, or until stalks are tender. Serve with almost anything.

***
Note: Save the stock. I used it for an outstanding matzo ball soup the following night. The herbal, green taste of the leafy bok choy infused the stock, and the mellow thyme balanced out the fresh dill I sprinkled directly into the soup.

Tibetan Momo, or Yak Dumplings


Tibetans love their yaks. ToastMom's recent trip to China featured a stop in Tibet where she claims she was nearly drowned in something called yak butter tea, a horrifying salty tea drink with butter made from yaks' milk churned into it. Far more delicious, though, are these traditional Tibetan dumplings, momo (or མོག་མོག, if you happen to read Tibetan).

Nepal also lays claim to these tasty dumplings, and I first tried them at a Nepalese/Himalayan restaurant in Washington, now closed. Their warm-spiced filling and slightly fluffy skins have haunted me every since. Once I had actual yak in hand, another craving hit. It seemed serendipitous, so I made my first ever foray into dough production in an effort to recreate the magic.

This is, of course, part three of ToastPoint's exotic meat series:

***
Tibetan Momo

First make the dough. Combine in a large mixing bowl:
3 cups flour
3/4 cup water
pinch baking soda

Mix the dough until crumbly, then use your hands to knead the dough into a coherent ball. Add additional water 1 Tablespoon at a time as necessary if dough refuses to cohere. When a ball has been formed, cover the dough with a damp cloth and let it rest from about an hour.

Meanwhile, make the filling. Combine:
1 yak rib eye steak, approx 1 lb., trimmed of fat and minced (ground or minced beef would work, too)
1 medium onion, finely chopped
1 small handful cilantro, chopped
1/4 teaspoon powdered ginger
1/8 teaspoon cinnamon
1/8 teaspoon nutmeg
1/4 teaspoon cumin
2 cloves garlic, finely minced or microplaned
1 Tablespoon soy sauce
2 Tablespoons oil

Let this mixture rest for the remainder of the hour. When the dough is ready, remove it from the bowl, knead it for another minute or two, then divide it into 1 inch diameter balls. Roll the balls between your hands, then flatten them into 4 inch circles. I used a rolling pin dusted with a little flour, but some recipes prefer momo skins made by patting each ball of dough flat with your hands. Your call. Put 1 Tablespoon of yak filling in the middle of the skin, then fold the skin in half and pinch the edges to seal them, making semicircular dumplings.

Put the dumplings into a steamer lined with a cabbage leaf or lightly oiled to prevent sticking, like the bamboo version pictured above. Steam for 20 minutes. Eat with soy sauce or jarred chili sauce for dipping.

For a hilariously weird version of this recipe, visit the website of Momo Tours.

Wednesday, April 25, 2007

Remember the Wonder

In today's New York Times, "A Soft Spot for the Anti-Artisanal" a brilliant pro-Kraft/Hostess/Wonderbread manifesto:

Into every life some Kraft Singles, Hostess Sno Balls and Snickers bars must fall. Could you possibly substitute a wedge of that pampered Camembert for a workaday Kraft Single on a tuna melt? Never. And equal only to the fetishistic satisfaction of eating the filling of an Oreo before you eat the cookie is peeling the Sno Ball’s coconut-sprinkled dome of marshmallow from the chocolate cupcake beneath it and saving its creamy center for last. These products are sui generis in our great American culture where variety rules; you can’t find a real substitute for any of them....

Don’t get me wrong. I’m genuinely glad about the progress being made in the culinary world, and I’m grateful that our daily diets are improving thanks to the tireless efforts of local farmers and obsessive compulsives who have chosen heritage pork as their final frontier instead of space. I salute them.

All I’m saying is that sometimes, people, you’ve still got to remember the wonder.

Tuesday, April 24, 2007

Kangaroo with Fig Sauce


Welcome to Part II of the ToastPoint exotic meat series. Today, kangaroo in fig sauce. When we ordered from exoticmeats.com, there was some sort of procurement delay. To make up for the dreadful incovenience of tardy deliver of bits of dead exotic animals, the fine people at Exotic Meats sent some extra kangaroo with our order.

We decided to pay the windfall forward by having a kangaroo dinner party, fairly bold considering that we figured there was a decent chance the meal would be inedible, either through native nastiness or ineptitude of preparation. To up the ante, we even invited a gen-u-ine Australian to the table.

We stocked up on cheese, made extra large portions of side dishes, plied our guests with (Australian) wine, and crossed our fingers. And lo and behold, the kangaroo was awesome. The tender, extremely flavorful, appealingly rosy meat was wolfed down (apologies for mixing species) by one and all. I can only assume that the reason humanity domesticated cows and not kangaroos is that cows are easier to catch in the first place. The sweetness of the caramelized fig complimented the meat perfectly.

Discussion at the table revolved around whether a kangaroo was, in fact, a giant rodent and its status as a pest Down Under--all of which were basically efforts to keep ourselves from feeling bad about eating such a charismatic megafauna.

It will seem like there is a lot of oil in the marinade, but kangaroo is very lean so many recipes recommend variations on a oil bath before cooking. And since the meat is so lean, it will dry out if you try for anything more the medium-rare--thus the quick sear and little else.

This fig sauce would be brilliant with pork or beef as well. So if you can't lay your paws on some kangaroo, you can still give it a whirl.

***
Kangaroo with Fig Sauce

Combine:
2-3 Tablespoons fig preserves
1 small onion, minced
4 cloves garlic, minced
1 1/2 inch fresh ginger, minced
4 generous Tablespoons olive oil
1 Tablespoon French mustard
1 lemon, juiced
2 Tablespoons fig vinegar, or balsamic vinegar with a bit for extra fig preserves

Pour marinade into a freezer bag and add:
1- 1 1/2 pounds of kangaroo loin filets

Marinate for as long as possible. I marinated mine overnight in the fridge.

About 1 hour before dinner, removed the bag from the fridge and bring kangaroo to room temperature.

Heat on high in a non-non-stick pan (cast iron or aluminum is best. If all you have is non-stick, it just means a little less tasty brown crust on the meat):
1 scant Tablespoon oil

When oil begins to shimmer and smoke, removed kangaroo from marinade, shake off excess and add to the pan. After 3 minutes, turn the filets. After three more minutes, removed the filets to a warm oven (250 degrees) and keep them there until ready to serve.

Meanwhile, reduce heat and pour the marinade into the pan. Deglaze with a little wine or water if things are too dry. Reduce the juices to a thick, syrupy sauce and serve on in a little pitcher or bowl on the side of the kangaroo.

Thursday, April 19, 2007

Buckwheat Noodles with Napa Cabbage and Almonds


Charmingly, the recipe that inspired this dish calls for crunched up packages of ramen noodles, not the snooty buckwheat soba you see above. If you have some TopRamen on hand, go for it and tell me how it turned out. I've never had anything like what this recipe--and the dozens of others like it I found online--so I don't know what it was really supposed to be like. I suspect it was meant to be more like an asiany crunchy salad or slaw. What I wound up with was more in the spirit of the sesame noodles or peanut noodles from your local Chinese place as an appetizer.

On the last sunny day in Boston before the recent bout of distinctly unspringlike weather, I tossed together this quick lunch for two while the H.V. napped upstairs between classes. When he descended, we munched these savory noodles in companionable quiet and enjoyed the warm sun coming in through the windows of our apartment. The toasty almonds and the tender cabbage seemed tentatively springlike, but the hot noodles were substantive enough to line our tummies and anchor us for one last battle with winter.

***
Buckwheat Noodles with Napa Cabbage and Almonds

Start some water boiling for the noodles. Meanwhile, melt in a large skillet:
3 Tablespoons butter

Add:
1/2 cup slivered almonds (I only had whole almonds, which I "slivered" with a large chef knife. The final result was rustic, but served its purpose)

Toast the almonds until golden, then add:
1 head Napa cabbage, chopped into coleslaw-like ribbons

While the cabbage softens, boil for a scant 2 minutes:
1 package buckwheat soba noodles, snapped in half or in quarters

Drain and rinse under cold water, then add them to the pan with the cabbage. Toss in:
4 scallions, green and white parts, chopped

Then add:
3 Tablespoons soy sauce
1 Tablespoon toasted sesame oil
1 Tablespoon rice vinegar (or other white vinegar)
2 Tablespoons rice wine (or honey mixed with water, or maple syrup)

Let the whole thing bubble away for a minute or two on high heat, then garnish with sesame seeds and serve hot.

***
For more pasta, presto!

Wednesday, April 18, 2007

Crocodile in Lime and Ginger (Seriously)

The Human Vacuum is on the march. His campaign to consume bits of increasingly bizarre animals led him to ExoticMeats.com, where he bought crocodile and fragments of several other strange beasts, which will be featured here in the coming days. For now, our freezer is a veritable menagerie.

The results so far: I hate to say it, but crocodile really does taste like chicken. Maybe chicken with a touch of the spongy, fishiness of swordfish. But basically chicken. Which isn't to say that the dinner pictured above was lacking in any way. It was delicious. But you could probably make it with chicken or swordfish to excellent effect and at much less expense.

Still, half the fun is just beng able to casually mention that you had crocodile for dinner last night, right?

***
Crocodile in Lime and Ginger

Combine in a shallow bowl:
Juice of 2 limes
Pinch cayenne pepper
1 inch fresh ginger, minced or grated
1 Tablespoon soy sauce

Add:
1 pound crocodile, cut into 1 inch chunks (or chicken or swordfish)

Marinate for an hour, or as long as possible (see here for my laissez-faire policy on marinating)

In a large skillet over high heat, warm until shimmering:
1-2 Tablespoons olive oil

Retreive chunks of crocodile from marinade and add them to the pan, reserving the juices for later use. Sear the crocodile for about 2 minutes on each side, then remove and keep warm. Turn the heat down to medium high and pour the leftover marinade into the pan, along with:
1 scallion, minced
1 Tablespoon honey
1 Tablespoon olive oil

Let it bubble and reduce to a thick sauce. Put the chunks of crocodile, along with any juices that have accumulated on the plate, back into the pan and toss to coat.

I served the croc on a bed of cubed zucchini sauted with 1 Tablespoon butter, 2 Tablespoons of fresh mint, salt, and cracked pepper.
***
Check out more experiments in reptillian eating here.

Monday, April 16, 2007

Salmon with Soy, Maple, and Adobo


Thank god for people who refuse to follow directions. I was drafted into an email recipe exchange (sort of a chain letter/pyramid scheme, but with recipes) and, for the first time in my life, actually decided to participate. It was a simple calculation--potential for a bunch of good recipes, versus almost no effort to send a recipe since I already had a website full of them. I got a decent yield, but the best of the bunch was this salmon from a person who, by the rules of the recipe exchange, shouldn't have sent it to me, but to the next person down on the list.

I opted to saute a plastic bag of baby spinach in 2 Tablespoons of olive oil and 3 cloves of minced garlic, and serve with some Whole Food corn bread muffin tops. The original recipe suggested serving the salmon with brown rice and oven-roasted asparagus, which I'm confident would be delicious as well.

The Human Vacuum said "You could get exactly this plate for $27 dollars at a nouveau cuisine-type place." It's true. The glaze was just fresh interesting enough, and the plating was very attractive, even if I do say so myself.

***
Salmon with Soy, Maple and Adobo

Mix together in a shallow bowl:
1/4 cup maple syrup
1 Tablespoon adobo, the red tomato-based sauce from a can of chipotle peppers (you can get these in the Mexican section of almost any grocery store, even though they sound fancy)
1/4 cup soy sauce

Add:
1 pound salmon filet

Marinate for a bit. (I had already broken that age-old rule and gone to the grocery store while absolutely starving. When I got home, I threw the marinade together, put the groceries away, and started cooking. 10 minutes at best. It was still awesome. The original recipe says to marinate for half an hour, which you should feel free to do. I consider it a point of honor to treat marinating times as loose suggestions at best--and am willing to do away with that step altogether if I'm in a hurry. Sort of like stop signs at deserted intersections.)

Anyway, saute the salmon in a skillet, browning both sides and cooking until just approaching opaque in the middle (see below for my super no-fail salmon sauteing technique). Meanwhile, briskly simmer the marinade in a separate saucepan until it is reduced to a scant 1/4 cup.

Drizzle glaze over fish and serve with the sides of your choice.

***
Super no-fail salmon sauteing technique
Heat up a dry skillet on high. When the skillet is very hot, drop in the salmon, skin side down. Wait for 2-3 minutes until the fat starts to render out. Then flip the salmon, scrape the skin off (which will be incredibly easy at this point), and throw the skin away. If the skin sticks to the surface of the pan, all the better. Just flip the fish to another part of the pan, scrape it up and throw it away. Sear the other side well (another 2 minutes, until a brown crust forms). Flip once more, then turn the heat to medium-low and cook until the fish starts to threaten to become opaque in the center. The gorgeous brown crust this technique creates is worth the house full of fishy smoke it produces, so open the windows before you try this technique and enjoy.

Tuesday, March 27, 2007

Roasted Grapefruit with Yogurt


Generally, I don't do fussy weekday breakfasts. In fact, solitary breakfast is almost always consists of toasting whatever carb is at hand and smearing it with the sugary contents of the first jar that comes to my attention in the refrigerator door. I find, though, that on the rare occasions when I get my act together and do something more elaborate for my first meal, it gives me the feeling that I'm really in control of my life. To be the kind of person who prepares breakfast for herself on a weekday morning is to be the anti-Bridget Jones, the sort of person who has an organized sock drawer and an empty inbox. There's meditative serenity in kitchen puttering that I can rarely manage to leave time for on a Tuesday morning. When I actually do carry it off, I have the distinct (slightly smug) sense that I have ascended to a higher plane of being.

For Christmas, I received a subscription to Martha Stewart's pint-sized magazine Good Food. Martha, of course, dwells perennially in the aforementioned higher plane of being. To date, I'd mostly used the magazine for breakfast reading, not actual breakfast recipes. But the first recipe in this month's issue was this grapefruit concoction, which was easy and insanely delicious. It turns out that attaining a higher plane of being isn't as hard as it looks.

***
Roasted Grapefruit with Yogurt
adapted from Martha Stewart's Good Food magazine

When you stumble downstairs half awake, turn on your broiler. Do not--I repeat, do not--forget that you turned it on and fall back asleep on the couch. Cut in half:
1 red grapefruit

Sprinkle each half with:
1 Tablespoon brown sugar (more if you suspect the grapefruit of being unsweet)

Stick the sugar-dusted grapefruit under the broiler for 4-5 minutes, or until you are too impatient to wait any longer. Remove and top each half with:
Large spoonful plain yogurt
pinch cinnamon

Martha suggests that you cut the grapefruit before broiling to make it easier to separate fruit from pith and peel. If you can manage this kind of knife work before breakfast, fine. For me, there are limits even to my ascension.

Wednesday, March 21, 2007

Beets and Cheese

The second in a series of odd eating when the Human Vacuum is out of town.

I consoled myself over the H.V.'s departure by buying about $30 worth of fancy cheese. One of the sillier purchases was a tiny glass jar of something called Miticrema, which I now know is a soft cream cheese-like sheep's milk cheese with a yogurty tang. I didn't know what it was when I bought it, of course. I'm just a sucker for tiny glass jars of expensive foodstuffs (see fig spread, caviar, french full fat yogurt, saffron, et al.)

Elsewhere in the grocery cart, a significantly less expensive pair of beets. I've never really loved beets. In salad bars, I find them quite alarming, lying there in coins that bleed magenta into the bin of chickpeas next door. But the recent craze for salads of layered roasted beet and goat cheese and walnuts/whatever in snooty restaurants has convinced me that I have been giving beets short shift. Having never bought a beet in my life, now was the time to face the beast, err, beet on my own turf. This dish always has a fancy description on restaurant menus, like "roasted beet napoleon" or something silly. You know what it really is? Beets and cheese, thank you very much.

And what better way to face the unfamiliar than with cheese?

***
Beets and Cheese

Turn the oven on to 450 degrees.

Wrap in foil:
1 beet, peeled
Put it in the oven (no need to wait for it to preheat). After an hour or so, unwrap the beet and stick a knife in to make sure it's soft and tender. If not, rewrap and give it another 10 minutes or so.

Slice the beet into rounds and rub on a little:
Balsamic vinegar (I used a nifty fig balsamic which was a gift from my oldest ToastFriend, which added even more rich sweetness to the beet)

Then build a tower of alternating layers of beet and:
Spoonfuls of miticrema, goat cheese, or other creamy, strongly-flavored cheese

Eat standing up in the kitchen with a side of leftover chickpeas from a pan in the fridge. Or as a fancy hors d'oeuvre. Whatever.

(Note: I could only make myself eat about half of a beet in this manner--the cheese is quite rich.)

Monday, March 19, 2007

Gnawing on Bones, Alone


Tonight at 8:45 p.m., I found myself savagely digging the marrow out of my third and final roasted beef bone with a grapefruit spoon. All because the Human Vacuum is out of town. Oh, how the mighty have fallen.

I thought the absence of the H.V. would be a good opportunity to load up the sort of food he tends to shun. Thus my impulse buy of three fat beef bones at the grocery store last night. I had the vague idea that people in British novels did something with marrow, and that it was considered a treat by small children. Fueled by that single blurry thought, I tossed them in my mini-cart at Whole Foods. Tonight, after fiddling around waiting for the Falcon 1 launch (aborted, again. sigh.), I cranked up the oven and tossed them in.

In the sprirt of the novels that inspired this dinner, I must tell you, Dear Reader, that the resulting dinner was scrumptious. Crunchy lemony salad, rich unctuous marrow, warm buttery toast. It was just what I dreamed it would be, and it was precisely the sort of thing best eaten alone, away from prying eyes--even of those who love us most. While eating, I descended into savagery, rasping my spoon around the inside of the bones to retrieve the last tasty morsels.

Hey, at least I was still using utensils, right?

***
Roasted Marrow on Toast
(Despite the rarity and seeming fancy-pantsness of this meal, it was quite easy to make. Rachel Ray could do a 30 Minute Meal of marrow bones and still have time left over to make a box cake. And it's a one-pan meal, so clean up is quick, too.)

Preheat the oven to 450 degrees.

Place on a foil-lined pan:
3 beef or veal bones, cut into 3 inch pieces

Arrange the bones cut sides down so that they stand like a tiny, meaty Stonehenge in the pan. Stick them in the oven for about 20 minutes. They'll be done when they bleed a little fat and the marrow is soft all the way through, which you can check by poking them with a skewer or thin knife.

While the bones are a-roastin', make a tiny salad. All the recipes I found online call for a parsely salad, which I'm sure would be lovely. But when you've impulse-bought beef bones, it's unlikely that you've also coincidentally impulse-bought two handfuls of parsely. So, I just used:
1 handful salad greens, torn small

Dress with the following, whisked together:
1/2 lemon, juiced
2 Tablespoons olive oil
1 clove garlic, minced or microplaned (I used a squeeze of the preprocessed stuff--no one was looking, so I figured I could get away with lazy man's garlic)
Salt and pepper

Then toast:
2 pieces plain white bread

Yank the bones out of the oven, arrange everything on a plate and serve with a small spoon for savage digging. To eat: scrape out the marrow, smoosh it onto triangle of toast, and (this step is very important) sprinkle with salt. Alternate with bites of salad.

Monday, March 05, 2007

Shrimp, Black Bean, and Corn Salsa


What follows is what is quaintly called a "pantry supper" in certain old-fashioned cookbooks. The genteel emphemism conceals this less-than-ladylike sentiment: "&%$#ing hell. There are zero fresh vegetables or meat in this house, but there is no way on God's green earth that I am going to the grocery store in this weather/this time of day/in this mood/in this shirt." This meal can be made entirely from the freezer and cupboards. The ingredients are, of course, suggestions. If you have pinto beans or chickpeas but no black beans, go for it. If you're fresh out of frozen corn, throw in peas or edamame, or whatever. The point is reduce stress, not create more.

***
Shrimp, Black Bean, and Corn Salsa

Combine in a large bowl:
1 can black beans, drained
2 cups frozen corn, thawed in the microwave.
1 pound shrimp, cooked and roughly chopped
1 teaspoon cumin
1/4 teaspoon cayenne pepper
Salt and pepper
Splash of soy sauce

Eat directly out of the bowl with tortilla chips, enjoying the hypnotic, soothing crunch that they create inside your head. If you're very lucky, and your freezer happened to have some Costco guacamole in it, eat it in alternate bites.

Saturday, March 03, 2007

Words of Wisdom

"I think bacon is essentially the meat lover's version of chocolate. It does the same thing to people."

Too true.


Read more about bacon's "new sizzle" in the Pueblo Chieftain.

Or learn how to make your own chocolate-covered bacon here.

Or admire Sir Francis Bacon, at right.

Your call.

Friday, March 02, 2007

Cook's Illustrated Brownies


There's something about brownies. They don't carry the Holly Homemaker baggage of cookies (cf. Hillary Clinton: "You know, I suppose I could have stayed home and baked cookies and had teas, but what I decided to do was fulfill my profession."), but they're not fussy either (cf. pastillage).

Inspired by Smitten Kitchen, I decided to experiment with a batch of Cook's Illustrated brownies. As is often the case, I was seized by the urge to bake at an inconvenient time. These things always take longer than you think, so it was 10:30 p.m. before the brownies were anywhere near the cutting stage. After tasting one and declaring it a success, the Human Vacuum got on the phone and called everyone we know in the apartment building. (This was an act of self-defense. An entire pan of brownies in the house only leads to the consumption of an entire pan of brownies unless steps are taken.) Next thing you know, we were hosting a mini brownie party. One visitor arrived sporting pajama pants paired with gold ballet flats. The lesson: Bake it, and they will come.

(A note: Cook's Illustrated is an outstanding magazine. So outstanding, in fact, that when the Human Vacuum and I moved to Boston, I considered applying for a job in their famed America's Test Kitchens. They make 100 pans of brownies to figure out the absolute best technique and ingredients. But before I made much progress on figuring out how to falsify my resume to make it seem like I had two years of restaurant experience, I was struck down by a bout of common sense.)

(Another note: There has been some recent controversy over brownies. From the latest in the "young women are in trouble" genre, Unhooked, by Laura Sessions Stepp: “Tying one on can be fun occasionally. Just don’t let it take over your social life. Organize weekend getaways and other events to bring people together. Bake cookies, brownies, muffins. Ask your girlfriends for assistance. Guys will do anything for homemade baked goods.”)

For more hot brownie action, check out Once Upon a Tart's browniebabe of the month event.
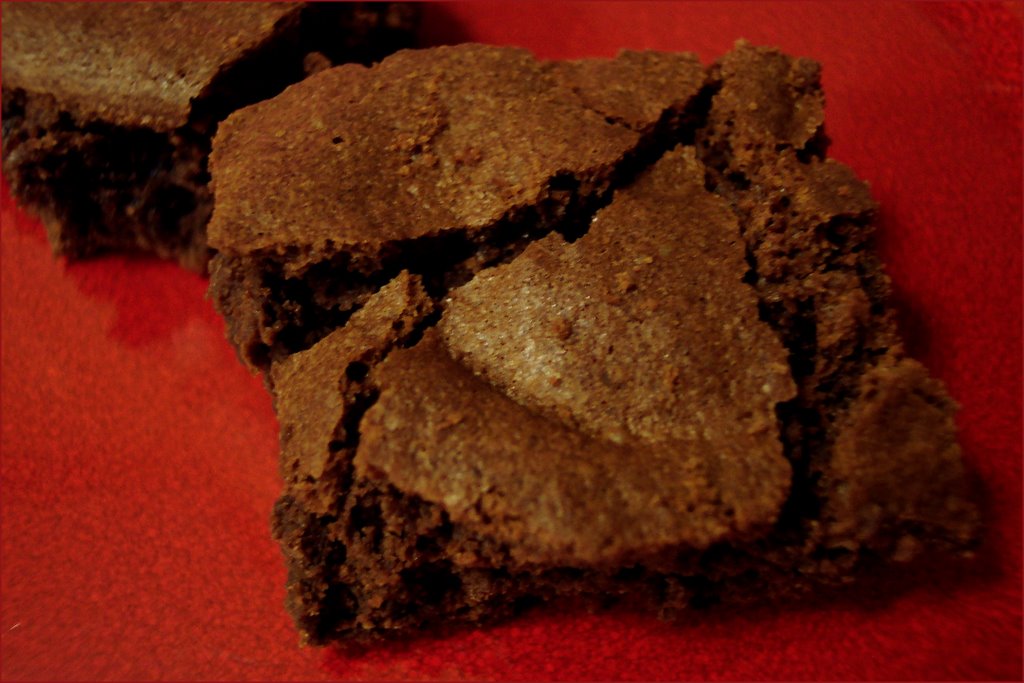
***
Classic Brownies

The recipe is quite involved, as Cook's recipes tend to be, and you can't improve on the directions offered by America's Test Kitchens, so I'm cutting and pasting from my source, Smitten Kitchen. It seems like a lot of work, but the perfect, crackly top and moist dense inside are worth it.

Be sure to test for doneness before removing the brownies from the oven. If underbaked (the toothpick has batter clinging to it) the texture of the brownies will be dense and gummy. If overbaked (the toothpick comes out completely clean), the brownies will be dry and cakey.

1 cup (4 ounces) pecans or walnuts, chopped medium (optional)
1¼ cups (5 ounces) cake flour
½ teaspoon salt
¾ teaspoon baking powder
6 ounces unsweetened chocolate, chopped fine
12 tablespoons (1½ sticks) unsalted butter, cut into six 1-inch pieces
2¼ cups (15¾ ounces) sugar
4 large eggs
1 tablespoon vanilla extract

1. Adjust oven rack to middle position; heat oven to 325 degrees. Cut 18-inch length foil and fold lengthwise to 8-inch width. Fit foil into length of 13 by 9-inch baking dish, pushing it into corners and up sides of pan; allow excess to overhand pan edges. Cut 14-inch length foil and, if using extra-wide foil, fold lengthwise to 12-inch width; fit into width of baking pan in same manner, perpendicular to first sheet. Spray foil-lined pan with nonstick cooking spray.

2. If using nuts, spread nuts evenly on rimmed baking sheet and toast in oven until fragrant, 5 to 8 minutes. Set aside to cool.

3. Whisk to combine flour, salt, and baking powder in medium bowl; set aside.

4. Melt chocolate and butter in large heatproof bowl set over saucepan of almost-simmering water, stirring occasionally, until smooth. (Alternatively, in microwave, heat butter and chocolate in large microwave-safe bowl on high for 45 seconds, then stir and heat for 30 seconds more. Stir again, and, if necessary, repeat in 15-second increments; do not let chocolate burn.) When chocolate mixture is completely smooth, remove bowl from saucepan and gradually whisk in sugar. Add eggs on at a time, whisking after each addition until thoroughly combined. Whisk in vanilla. Add flour mixture in three additions, folding with rubber spatula until batter is completely smooth and homogeneous.

5. Transfer batter to prepared pan; using spatula, spread batter into corners of pan and smooth surface. Sprinkle toasted nuts (if using) evenly over batter and bake until toothpick or wooden skewer inserted into center of brownies comes out with few moist crumbs attached, 30 to 35 minutes. Cool on wire rack to room temperature, about 2 hours, then remove brownies from pan by lifting foil overhang. Cut brownies into 2-inch squares and serve. (Store leftovers in airtight container at room temperature, for up to 3 days.)

Friday, January 19, 2007

Shrimp Quiche


I'm not going to lie: This wasn't a quick, easy dinner. I usually have a high tolerance for culinary multitasking, but this requires rather hard kitchen labor for something that sits on Pillsbury pie crust.

Which isn't to say it wasn't tasty as hell. The results were pretty amazing. Coincidentally, Mark Bittman did a New York Times video and article on a Chinese dish of shrimp with scrambled eggs and scallions, which is basically the concept here. Bittman enthuses about how the taste of the shrimp permeates the eggs, which doesn't really sound very good, but is actually delicious.

Make if you are in the mood for something familar, but with a twist. Or if you want to impress people at a potluck brunch.

***
Shrimp Quiche

Preheat the oven to 350 degrees.

In a mixing bowl, beat together then set aside:
2 eggs
1/2 cup grated cheddar, smoked gouda, or similar
1/4 cup Parmesan
salt and pepper

In a large skillet, warm over medium heat:
2 Tablespoons butter
1 Tablespoon olive oil (to prevent the butter from burning)

Add:
2 medium onions, roughly diced
1 pinch cayenne pepper

While the onions are cooking, place in a nine-inch pie pan:
1 premade crust
(Or make your own, but don't ask me about that.) Weigh down the inside of the crust with something to keep it from puffing up. People use all kinds of fancy things for this, but I just put a smaller round pan on top, and it worked fine. Cook the crust for 10 minutes. Remove from the oven and set aside when it seems fairly solid, but before it starts to brown.

Meanwhile, when the onions begin to soften, add:
2 heads broccoli, peeled
Break the trees into the smallest possible florets, and cut the stem into coins
(The broccoli could be replaced with another veggie, but there's something so right about broccoli in quiche, I think.)

When the broccoli is starting to soften, and the edges are browning slightly, add:
1 pound peeled, uncooked shrimp, roughly chopped
(You could use cooked shrimp here, too. Just add it right before you dump everything into the crust)

When the shrimp turns just barely pink, turn out the contents of the pan into the pre-baked crust. Pour the egg mixture in over the veggies and shrimp, then stick the whole thing in the oven for 30 to 40 minutes, or until the top browns and bubbles. At some point in the cooking process, I sprinkled some paprika over the top, which looked nice. Remove the quiche from oven when the jiggling in the middle of the quick seems to have more or less ceased, and let sit for a few minutes. Then dive in for a hot dinner, or serve at room temperature for brunch.